WordPress Widget Code

Creating a New WordPress Widget

Been moving some sites to WordPress, and one plugin I could not find a satisfactory result for was one to display or feature the contents of a page. I was also looking for excuses to write about development more often or just about anything. I have not done much with Codefisher.org recently and would like to change that. Tutorials out there for creating widgets were not good quality (or possibly outdated), so I figured good opportunity to do something. Create a tutorial on how to make a widget out of the first simple version of such a plugin and then go on to develop it more fully. You could take this as the tutorial I would have liked to have existed to get myself to get things started.

Getting Started

I will assume that someone following this has basic knowledge of PHP and coding and knows enough about creating the files needed to get a plugin for WordPress going.

So, create a folder for your plugin in the WordPress plugins directory and then create a PHP file. I called mine feature-page-widget.php. Change yours to whatever describes what you are doing.

So let us put the basic code we need in. This code will be our widget class, and some code to get it loaded in.

<?php
/**
* Plugin Name: Feature a Single Page Widget
* Plugin URI: https://codefisher.org/wp-plugins/feature-pages-widget/
* Description: Makes a widget that can feature a page.
* Version: 0.1
* Author: Codefisher
* Author URI: https://codefisher.org/wp-plugins/feature-pages-widget/
* License: GPL2
**/

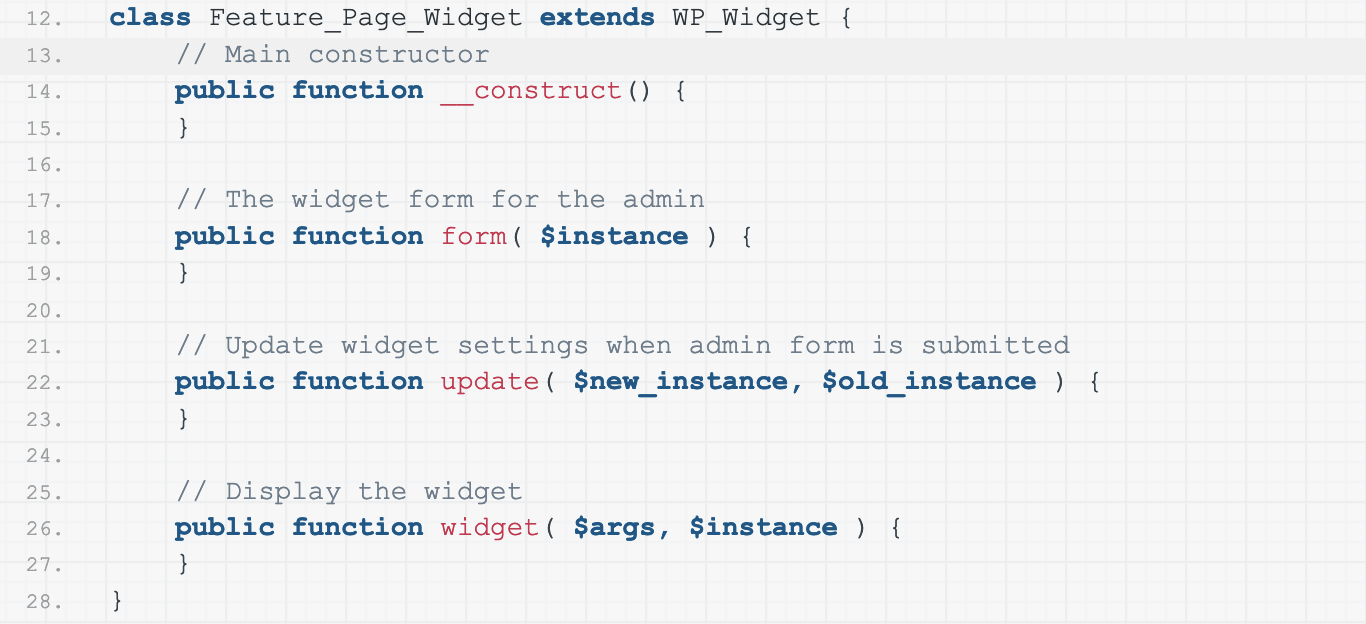
class Feature_Page_Widget extends WP_Widget {
    // Main constructor
    public function __construct() {
    }

    // The widget form for the admin
    public function form( $instance ) {   
    }

    // Update widget settings when admin form is submitted
    public function update( $new_instance, $old_instance ) {
    }

    // Display the widget
    public function widget( $args, $instance ) {
    }
}

// Register the widget
function register_feature_page_widget() {
    register_widget('Feature_Page_Widget');
}
add_action('widgets_init', 'register_feature_page_widget');

?>

So obviously, here you want to change the opening comment from my information to yours and probably rename both the class and function. After saving this to a file, you will have a WordPress plugin. If this is your first time, congratulations. Great job!

It will not do anything yet, but we can go to our WordPress site (hopefully one that is only a development environment, not your live site!) and check the plugins in the admin, it should now show, and it can be activated.

Though we registered a widget, it will not have caused anything to happen. For that, we must fill in the class’s four methods. They are the following.

  1. Constructor to initiate the widget
  2. The form() function to create the widget form in the WordPress administration
  3. The update() function to save the widget date when the form is submitted
  4. The widget() function to display the widget on the front end of your site.

The Constructor

So the first thing we need to do is set up the constructor, so it will give some basic information that describes the widget. This information is going to appear anywhere that WordPress lists the available widgets. After you save this and a non-functional widget will appear in the admin.

    // Main constructor
    public function __construct() {
        parent::__construct(
            'fspw_widget', // Base ID
            esc_html__( 'Feature a Single Page Widget', 'feature-page-widget' ), // Name
            array(
                'description' => esc_html__( 'A widget to feature a single page.', 'feature-page-widget' ),
                'customize_selective_refresh' => true,
            )
        );
    }

The form function

So next is to set up a form for the admin for the data to be put in. Here we will keep this super simple and use two text inputs for a title and page ID. It might be nicer (if the site is not too big) to have a dropdown to select the page, but here we will go for raw and simple deliberately.

    // The widget form for the admin
    public function form( $instance ) {
        // Some default values for the widget options
        $defaults = array(
            'title' => '',
            'featured_page_id' => '',
        );
        
        // any options not set get the default
        $instance = wp_parse_args( $instance, $defaults );

        // widget admin form begins
        ?>

        <p class="fspw-widget-title">
            <label for="<?php echo $this->get_field_id( 'title' ); ?>">
                <?php _e( 'Title:', 'feature-page-widget' ); ?>
            </label>
            <input type="text" class="widefat" id="<?php echo $this->get_field_id( 'title' ); ?>" name="<?php echo $this->get_field_name('title'); ?>" value="<?php echo $instance['title']; ?>" />
        </p>
        
        <p class="fspw-widget-featured-page-id">
            <label for="<?php echo $this->get_field_id( 'title' ); ?>">
                <?php _e( 'Page ID:', 'feature-page-widget' ); ?>
            </label>
            <input type="text" class="widefat" id="<?php echo $this->get_field_id( 'featured_page_id' ); ?>" name="<?php echo $this->get_field_name('featured_page_id'); ?>" value="<?php echo $instance['featured_page_id']; ?>" />
        </p>
        
        <?php
    }

Save this, and the widget will now give us a form. So basically, we set up some default values for our form. Here they are empty strings, but for a checkbox, we would use true or false, for example. We then use that to fill in anything missing from the current instance given to the function. Finally, we spit out some HTML to display the form. Submitting the form, though, does nothing, and the values will be lost. So we need to handle updating the values.

The update function

So the update function will handle receiving the data and, very importantly, sanitizing it. Luckily for us, WordPress makes this maybe the most straightforward part of what we are doing. So the following code is that that is going to be needed here.

    // Update widget settings when admin form is submitted
    public function update( $new_instance, $old_instance ) {
        // update old options with the new ones
        $instance = wp_parse_args( $new_instance, $old_instance );
        
        /* sanitise the data */
        
        // Plain Text
        $instance['title'] = sanitize_text_field( $instance['title'] );
        
        if( !intval( $instance['featured_page_id'] ) ) {
            $instance['featured_page_id'] = '';
        }
        
        return $instance;
    }

That will get our widget into the database and saved. Now we have to make the form appear on the front end where it has been placed. So there is one last function that we must complete to do that.

The widget function

Here what we are going to do is again load some default, check if we have a page ID to go looking for, then check if that page actually exists, and then display our title and the excerpt.

    // Display the widget
    public function widget( $args, $instance ) {
        
        // Some default values for the widget options
        $defaults = array(
            'title' => '',
            'featured_page_id' => '',
        );
        
        // any options not set get the default
        $instance = wp_parse_args( $instance, $defaults );
        
        // if there's no featured post ID, we can stop now.
        if( !$instance['featured_page_id'] ) {
            return;
        }
        
        // get post, end if there is it does not exist
        $featured_page = get_post( $instance['featured_page_id'] );
        if( $featured_page == null) {
            return;
        }
        
        // apply widget_title filter if there's a title
        $title = apply_filters( 'widget_title', empty($instance['title']) ? $featured_page->post_title :  $instance['title'], $instance, $this->id_base );
        echo "<h2>" . $title . '</h2>';
        
        // apply the_excerpt filter
        $excerpt = apply_filters( 'the_excerpt', $featured_page->post_excerpt );
        echo $excerpt;
    }

And that is it. We got a working widget that is putting out the excerpt for a page. But, of course, we can go much further with this particular widget. I plan to develop it into something much more full-featured and will post back here once that is done. But it shows how you can start a widget that does something simple.

I will update this post when I release the completed plugin.

Updates to Codefisher

So today I am replacing the old site with a new one. I have removed almost all the content for stuff that I no longer intend to maintain. Much had become a bit of an embarrassment rather than something I want to share. The projects left are those that I want to begin to start building on again.

How to Create an Ordered Counter class in Python

After I made my post How to Group and Count with Dictionaries, I noticed there was something nice I could have added. That was how to make a counter class that also remembers the order in which it first found something. It is super easy (pun intended) to do in Python. See the following.

from collections import Counter, OrderedDict

class OrderedCounter(Counter, OrderedDict):
	pass 

This code works because of the method resolution order. You can easily find out what that is by trying help(OrderedCounter) into the python console. I have reproduced what you would get for Counter and OrderedCounter below.

Counter
 |  Method resolution order:
 |      Counter
 |      __builtin__.dict
 |      __builtin__.object

OrderedCounter
 |  Method resolution order:
 |      OrderedCounter
 |      collections.Counter
 |      collections.OrderedDict
 |      __builtin__.dict
 |      __builtin__.object

What has changed is that now OrderedDict has been inserted in the order in which methods which be searched for when using OrderedCounter just before dict. So all of the dictionary methods will come OrderedDict instead of dict giving us the result we want.

You can use this method of inheritance on any class that inherits from dict where you want to keep the order of its key as that in which they are inserted. In the more general case, you can use it to create a new class that uses an alternative implementation of some interface.

For more information on this, there is an excellent post by Raymond Hettinger called Python’s super() considered super! that goes into all this in way more detail.

The property function: why Python does not have Private Methods

Now and then, I see it said that Python should have private or protected methods on its classes. This typically comes from someone used to programming in Java or C++ or the like, who misses them and insists they are essential for any programming language. But python does not have them and never will. Private methods are a solution that works in statically typed languages. It is not the solution for a highly dynamic language like Python.

tl;dr Python has a dynamic way of fixing this problem. Just scroll down to the end to see the code.

But let us look at the problem starting with an example class. Let us do something non-trivial that might be used in the real world: a class that handles colour manipulation, maybe because I am building a colour picker or doing something cool with colours. So my code might start like this.

class Colour(object):
    """A colour wrangler class"""
    def __init__(self, hexcode="ff0000"):
        self.hexcode = hexcode

I would then add a pile of other methods that will be needed, but let us focus on this. The class has this hexcode attribute that anyone can now access. So I build the rest of my project around this and access the hexcode in many places in my code, and others start doing it in theirs as well.

But then I hit a problem, storing the colour as a hex string is clumsy since I have to keep getting out the RGB components any time I want to manipulate it, and also when trying to convert to other colour spaces and back again, I get rounding errors. So I now want to store it as three floats. So I update my code.

class Colour(object):
    """A colour wrangler class"""
    def __init__(self, hexcode="ff0000"):
        self.r = float(int(hexcode[0:2], 16))
        self.g = float(int(hexcode[2:4], 16))
        self.b = float(int(hexcode[4:6], 16))

Now everyone else’s code that depended on the hexcode attribute is broken. At this point, the Java/C++ people would say I told you so. If only you had static methods, you could have had getter and setter methods and kept the attribute private. But that is never going to happen in Python. Python is too dynamic to check this at compile time, and run-time checking would be far too expensive. But python does have an elegant solution to this. It is the built-in property function. This is how I would now fix my code using it.

class Colour(object):
    """A colour wrangler class"""
    def __init__(self, hexcode="ff0000"):
        self.hexcode = hexcode
    
    @property
    def hexcode(self):
        """Return the colour as a hex string"""
        return ("{:02x}" * 3).format(int(self.r), int(self.g), int(self.b))
    
    @hexcode.setter
    def hexcode(self, hexcode):
        self.r = float(int(hexcode[0:2], 16))
        self.g = float(int(hexcode[2:4], 16))
        self.b = float(int(hexcode[4:6], 16))

I can now get and set the hexcode attribute as before, and it will all get transparently handled. I have even used it as a setter in my __init__ method, so I don’t have to repeat the conversion.

Note that @property is put first, before the function that acts as the getter, and then @hexcode.setter not @property.setter is used to define the setter. You can’t change the order and expect it to work. Also, note that the two functions have the same name. And the doc string from the getter will be given if you do help(Colour.hexcode).

There is also an alternative way of doing the same thing, this time not using property as a decorator.

class Colour(object):
    """A colour wrangler class"""
    def __init__(self, hexcode="ff0000"):
        self.hexcode = hexcode
    
    def gethexcode(self):
        return ("{:02x}" * 3).format(int(self.r), int(self.g), int(self.b))
    
    def sethexcode(self, hexcode):
        self.r = float(int(hexcode[0:2], 16))
        self.g = float(int(hexcode[2:4], 16))
        self.b = float(int(hexcode[4:6], 16))
    
    hexcode = property(gethexcode, sethexcode, doc="Return the colour as a hex string")

This gives the same result, except it also exposes the two functions as an alternative way of getting/setting the value. Also, for completeness, I guess I should mention there is a deleter as well, which can be passed as the third argument to property, or used as @hexcode.deleter, but that seems less useful to me.

I would say I prefer the python way of doing it. First, it means I only have to define the getter and setter functions after the fact of an API change, not as some pre-emptive move just in case it changes later. Also, it looks cleaner to me to access attributes than call methods.

You can also use this to create read-only attributes by leaving out the setter (you will get an AttributeError) or adding some validation around an attribute to prevent some invalid values be added in. I could, in this case, make the self.r etc. into attributes as well to ensure they are in the correct range of 0 to 255.

This, however, will not stop people from messing with variables you wanted to be protected (indicated by putting an underscore before it). But you told them they are playing with fire. If they get burned, that can’t be helped. So this python solution does not cover all use cases that private and protected methods are supposed to, but it covers enough that I think the need for them is not significant in Python. Instead, Python has its own very powerful and flexible solution.

Python How To: Group and Count with Dictionaries

In this post, I want to have a look at the different possible solutions to two rather simple and closely related problems. How to group objects into a dictionary, or count them. It is something that at least I have found I do every now and then in various forms. I want to start from the simplest good solution and work towards better and faster solutions. The code can be downloaded off gist.github.com.

Grouping

So the problem that we want to solve is that we have some items that we want to group according to some criteria. So in python that is going to be turning a list or some other iterable into a dictionary of lists. We are also going to want some function to create the value we group by, and for the sake of simplicity, we will use len() it since that is the simplest built-in function that gives a key we might group on. In your own code, you would replace that with some logic that gives you the key or tag that you want to group things by.

Or to put that all in pseudo-code – also working python 😉 that would be the following:

names = ['mark', 'henry', 'matthew', 'paul',
         'luke', 'robert', 'joseph', 'carl', 'michael']

d = {}
for name in names:
    key = len(name)
    if key not in d:
        d[key] = []
    d[key].append(name)

# result: d = {4: ['mark', 'paul', 'luke', 'carl'], 
#              5: ['henry'], 6: ['robert', 'joseph'], 7: ['matthew', 'michael']}

So that is a nice start, loop over the data, and create a key value for each. Then we do a check to see if it is already there or not. This here is the best way to check if a key is in a dictionary. The alternative is either doing try except around a key lookup, which is really ugly and slow. Or checking the return value of get() but that prevents putting None values in the dictionary.

There is a downside to this, and that is where the key has to be hashed two or three times (python dictionaries are internally a kind of hash map, that gives them their almost linear lookup time). First in the if statement, and a possible second in the assignment to an empty list() and finally in the lookup for the append. That python has to hash the value has an overhead. So how might we do better? The following is one possible better solution.

d = {}
for name in names:
	key = len(name)
	d.setdefault(key, []).append(name)

This uses the setdefault() method. This is a function, that even the developers of Python admit freely is confusingly named. The problem is any descriptive alternatives look like do_a_get_lookup_but_if_not_found_assign_the_second_argument(). So more or less, the same code as we wrote ourselves before, but since it is done by the dictionary itself, the key is only hashed once. It will be faster when we have lots of values.

This is still not the best code that we could do, there is a nicer way. It involves using a data structure called defaultdict that lives in the collections module. If you have not checked out the collections module recently, I recommend you read its docs, there are a number of very useful utilities in it. With that aside, defaultdict lets us create a dictionary-like object that is different only in that if a lookup fails, it uses the argument passed to it during creation (in our case list) to fill that key in. It lets us now write code like this:

from collections import defaultdict

d = defaultdict(list)
for name in names:
	key = len(name)
	d[key].append(name)

So now we can just look up the key and append it to it, not worrying about if it exists or not. If it does not, the defaultdict will create the value for us.

Counting

Now we have mastered grouping, counting should be simple. We just have to know that int() when called returns the value 0, so that can be passed to defaultdict. So here we have:

from collections import defaultdict

d = defaultdict(int)
for name in names:
	key = len(name)
	d[key] += 1

Here a common use case is not even to use a key, but to count just the number of times something appears. In that case, we could do the following simplified version.

from collections import defaultdict

names = ["mark", "john", "mark", "fred", "paul", "john"]

d = defaultdict(int)
for name in names:
	d[name] += 1

#result: d = {'mark': 2, 'john': 2, 'fred': 1, 'paul': 1}

This was considered common enough that there is even a built-in way to do this using Counter, so the above can be reduced to this.

from collections import Counter
names = ["mark", "john", "mark", "fred", "paul", "john"]
d = Counter(names)

Counter comes with some nice little extras, such as being able to add, or subtract results. So we could do something like the following.

from collections import Counter
boys = ["mark", "john", "mark", "fred", "paul", "john"]
girls = ["mary", "joan", "joan", "emma", "mary"]
b = Counter(boys)
g = Counter(girls)
c = b + g
#result: c = Counter({'mark': 2, 'joan': 2, 'john': 2, 'mary': 2, 'fred': 1, 'paul': 1, 'emma': 1})

But what happens if you want to use Counter but need to pass the result through some key function first? How would you do it? The solution would be to put a generator inside of it like the following.

from collections import Counter
names = ['mark', 'henry', 'matthew', 'paul',
         'luke', 'robert', 'joseph', 'carl', 'michael']
d = Counter(len(name) for name in names)

Useful key functions

Some possible common cases when grouping or counting, is you might want to do so based on some item in or attribute of the items you are grouping. So for examples, your data might be a tuple of first and last names, or a dictionaries with first and last name keys, or a class with first and last name attributes. If that is what you group or count by, there are two built in functions that can help do this, without needing to write our own functions. Those are itemgetter() and attrgetter from the operator module. Some examples might help.

from collections import defaultdict
from operator import itemgetter, attrgetter

# if names used tuples
names = [('mary', 'smith'), ('mark', 'davis')]
# the last_name function would look like
last_name = itemgetter(1)

# if names are dictionaries
names = [{'first': 'mary', 'last':'smith'), ('first': 'mark', 'last': 'davis')]
# the last_name function would look like
last_name = itemgetter('last')

# if names are classes with first and last as attributes
names = [Person('mary', 'smith'), Person('mark', 'davis')]
# the last_name function would look like
last_name = attrgetter('last')

d = defaultdict(list)
for name in names:
	key = last_name(name)
	d[key].append(name)

Bonus

When I was studying Software Engineering I got a job tutoring for the first year programming course, which was in python and had 200-300 students depending on semester (hence the need for tutors to help with questions during practicals). One the challengers some of more curious students used to ask, is how I would do certain things in one line (I ended up doing their whole first assigment in a single 1500 character line). Often really bad code, but also often rather interesting trying to reduce a problem to a single statement. I had a shot at doing it for this, and this was the solution that I came up with in a few minutes. I leave working out how it works as an exercise to the reader. I would never use it in production code.

names = ['mark', 'henry', 'matthew', 'paul',
         'luke', 'robert', 'joseph', 'carl', 'michael']
# len is our 'key' function here
d = {k: [i for x, i in v] 
     for k, v in itertools.groupby(sorted((len(x), x) for x in names), 
     key=operator.itemgetter(0))}

Python: Tips, Tricks and Idioms – Part 2 – Decorators and Context Managers

Two weeks ago, I wrote a post called Python: tips, tricks and idioms, where I went through many features of python. However, I want to narrow down on just a few and look at them in more depth. The first is decorators, which I did not cover, and the second is context managers, which I only gave one example. Again all the code samples are on gist.github.com.

There is a reason that I put them together; they both have the same goal. They can both help separate what you are trying to do (the “business logic”) from some extra code added for clean-up or performance etc. (the “administrative logic”). So basically, it helps package away in a reusable way code that we don’t care too much about.

Decorators

Decorators are easy to use, even if you have never seen them. You could probably guess what is going on, even if not how or why. Take this for example:

@cache
def web_lookup(url):
    page = urlopen(url)
    try:        
        return page.read()
    finally:
        page.close()

Overlooking for now precisely what library urlopen comes from… We can assume that the results of web_lookup() will be cached so that they are not fetched every time we ask for the same URL. So simple, just know we can put @some_decorator before our function, and we can use any decorator. But how do we write one?

First, we need to understand what the decorator is doing. @cache is just syntactic sugar for the following.

web_lookup = cache(web_lookup)

So this is important. What cache is, is a function that takes another function as an argument and returns a new function that can be used just like the function could be before, but presumably adding in some extra logic. So for our first decorator, let us start with something simple, a decorator that squares the result of the function it wraps.

def square(func):
    def _square(num):
        return func(num) ** 2
    return _square

# which we can then use like this

@square 
def plus(num):
    """Adds 1 to a number"""
    return num + 1

So in this little example, every time we call plus() the number will have 1 added to it, but because of our decorator, the result will also be squared.

But there is a problem with this, plus() is no longer the plus() function that we defined, but another function wrapping it. Such things like the doc string have gone missing. Things like help(plus) will no longer work. But in the functools library, there is a decorator to fix that, functools.wraps(). Always use functools.wraps() when writing a decorator.

from functools import wraps

def square(func):
    @wraps(func)
    def _square(num):
        return func(num) ** 2
    return _square

But did you notice? wraps() is a decorator that takes arguments. How do we write something like that? It gets a little more involved, but let us start with the code. It will be a function that now raises the number to some power.

def power(pow):
    def _power(func):
        @wraps(func)
        def _pow(num):
            return func(num) ** pow
        return _pow 
    return _power

@power(2) 
def plus(num):
    """Adds 1 to a number"""
    return num + 1

So yes, three functions, one inside the other. The result is that power() is no longer the decorator but a function that returns the decorator. See, the issue is one of scoping, which we why we have to put the functions inside each other. When _pow() is called the value of pow, comes from the scope of the power() function that contains it.

So now we know how to write highly reusable function decorators, or do we? There is a problem still, and that is our internal function _square() or _pow() only takes one argument, so any function it wraps can take only one argument. What we want is to be able to have any number of arguments. So that is where the star operator comes in.

Star operator

The * (star) operator can be used in a function definition to take an arbitrary number of arguments, all of which are collapsed into a single tuple. An example might help.

def join_words(*args):
    """Joins all the words into a single string"""
    return " ".join(args)

print(join_words("Hello", "world"))

The * operator can also be used for the reverse case when we have an iterator, but we want to pass that as the arguments to a function. This gets called argument unpacking.

words = ("Hello", "world")
print(join_words(*words))

The same basic idea can also be used for keyword arguments. For this, we use the ** (double star) operator. But instead of getting a list of the arguments, we get a dictionary. We can also use both together. So some examples.

def print_args(*args, **kwargs):
    print(args)
    print(kwargs)

print_args("Hello", "world", count=2, letters=10)

# output:
# ('Hello', 'world')
# {'count': 2, 'letters': 10}

# or calling the function with argument unpacking.

words = ("Hello", "world")
arguments = {'count': 2, 'letters': 10}

print_args(*words, **arguments)

Better Decorators

So now we can go back and change our decorator to be truly generic. Let’s do it with the simplest one, we wrote, @square.

def square(func):
    @wraps(func)
    def __square(*args, **kwargs):
        return func(*args, **kwargs) ** 2
    return __square

Now no matter what arguments the function takes, we will happily just pass them through to the function we are wrapping.

So let us go back to our web_lookup function and write it first with caching, and then write the decorator to see the difference.

saved = {}

def web_lookup(url):
    if url in saved:
        return saved[url]
    page = urlopen(url)
    try:        
        data = page.read()
    finally:
        page.close()
    saved[url] = data
    return data

That is how it might look, and our problem here is that the caching code is mixed up with what web_lookup() is supposed to do. It makes it harder to maintain it, harder to reuse it, and harder to update the way we cache it if we have done something like this all over our code. So our very generic decorator might look like this.

def cache(obj):
    saved = obj.saved = {}
    @functools.wraps(obj)
    def memoizer(*args, **kwargs):
        key = str(args) + str(kwargs)
        if key not in saved:
            saved[key] = obj(*args, **kwargs)
        return saved[key]
    return memoizer

# now our nice clean web_lookup()

@cache
def web_lookup(url):
    page = urlopen(url)
    try:
        return page.read()
    finally:
        page.close() 

So that can wrap any function with any number of arguments just by putting @cache before it. But I did not write that function myself. I just lifted it right off the Python Decorator Library, which has many examples of decorators you can use.

Context Managers

In the previous post, I did a single example of using a context manager, opening a file. It looked like this:

with open('/etc/passwd', 'r') as f:
    print(f.read())

# which is equivalent to the longer

f = open('/etc/passwd', 'r')
try:
    print(f.read())
finally:
    f.close()

Admittedly the context manager is only a little shorter, and the file will be garbage collected (at least in CPython), but there are other cases where it might be a bigger problem if you get it wrong. So, for example, the threading library can also use a context manager.

lock = threading.Lock()
with lock:
    print('Critical section')

This is nice and simple, and you can see from the indent what the critical section is and be sure the lock is released.

If you are dealing with a file-like object that doesn’t have a content manager, the contextlib has the closing context manager. So let us go back and improve our web_lookup() function.

from contextlib import closing

def web_lookup(url):
    with closing(urlopen(url)) as page:
        return page.read()

We can also write our own context managers. All that is needed is to use the @contextmanager decorator and have a function with a yield in it. The yield marks the point at which the context manager stops while the code within the with statement runs. So the following can be used to time how long it takes to do something.

from contextlib import contextmanager
import time

@contextmanager
def timeit():
    start = time.time()
    try:
        yield
    finally:
        print("It took", time.time() - start, "seconds")

# this might take a few seconds
with timeit():
    list(range(1000000))

The try finally in this case, is optional, but without it, the time would not be printed if there was an exception raised inside the with statement.

We can also do more complicated context managers. The following is something like what was added in Python 3.4. It will take whatever is printed to sysout and put it in a file (or file-like object). So, for example, if we had all our timeit() context managers in your code and wanted to start putting the results into a log file. Here the yield is followed by a value, which is why we can then use the with ... as syntax.

from contextlib import contextmanager
import io, sys

@contextmanager
def redirect_stdout(fileobj=None):
    if fileobj is None:
        fileobj = io.StringIO() # in python 2 use BytesIO
    oldstdout = sys.stdout
    sys.stdout = fileobj
    try:
        yield fileobj
    finally:
        sys.stdout = oldstdout

with redirect_stdout() as f:
    help(pow)
help_text = f.getvalue()

with open('some_log_file', 'w') as f:
    with redirect_stdout(f):
        help(pow)

# above can be also written as
with open('some_log_file', 'w') as f, redirect_stdout(f):
    help(pow)

The last with statement also shows off the use of compound with statements. It is just the same as putting one with inside another.

Finally, at least in passing, it is worth mentioning that any class can be turned into a context manager by adding the __enter__() and __exit__() methods. The code in either will do more or less what the code on either side of the yield statement would do.

And that is all for this round. I hope you learned something new and interesting. Don’t forget to follow me on Twitter if you want more python tips, such as when I write about sets and dictionaries next time. In the meantime, if you are looking for more, there is an excellent book, Python Cookbook, Third edition by O’Reilly Media. I have been reading parts of it and might include a few things I learned from it in my next post. Or, if you want something simpler, try Learning Python, 5th Edition.

Python: Tips, Tricks and Idioms

My programming language of preference is python because I feel I write better code faster with it than I do with other languages. However, it also has a lot of nice tricks and idioms to do things well. Therefore, and partly as a reminder to use them, and partly because I thought this might be of general interest, I have put together this collection of some of my favourite idioms. I am also putting this on gist.github.com so that anyone that wants to contribute their things can, and I will try and keep this post up to date.

enumerate

A fairly common thing to do is loop over a list while keeping track of what index we are up to. Now we could use a count variable, but python gives us a nicer syntax for this with the enumerate() function.

students = ('James', 'Andrew', 'Mark')
for i, student in enumerate(students):
    print i, student
# output:
# 0 James
# 1 Andrew
# 2 Mark 

set

set is a useful little data structure, it is kind of like a list, but each value in it is unique. There are some valuable operations, besides creating a list of unique items, that we can do with it. For example, let us try different ways of validating input lists.

colours = set(['red', 'green', 'blue', 'yellow', 'orange', 'black', 'white'])

# or using the newer syntax to declare the set.
input_values = {'red', 'black', 'pizza'}

# get a list off the valid colours
valid_values = input_values.intersection(colours)

print valid_values
# output set(['black', 'red'])

# get a list of the invalid colours
invalid_values = input_values.difference(colours)

print invalid_values
# output set(['pizza'])

# throw exception if there is something invalid 
if not input_values.issubset(colours):
    raise ValueError("Invalid colour: " + ", ".join(input_values.difference(colours)))

Control statements

with

The with statement is useful when accessing anything that supports the context management protocol. This means open() for example. It ensures that any set-up and clean-up code, such as closing files, is run without worrying about it. So, for example, to open a file:

with open('/etc/passwd', 'r') as f:
    print f.read()

for … else

This is an interesting bit of syntax. It allows you to run some code if the loop never reached the break statement. It replaces the need to keep a tracking variable for if you broke or not. Just looking over my code, here is a pseudo version of something I was doing.

# some code

for file_name in file_list:
    if is_build_file(file_name):
        break
else: # no break
    make_built_file()

# something else here

Conditional Expressions

Python allows for conditional expressions, so instead of writing an if .. else with just one variable assignment in each branch, you can do the following:

# make number always be odd
number = count if count % 2 else count - 1

# call function if object is not None 
name = user.name() if user is not None else 'Guest'
print "Hello", name

This is one of the reasons I like python. The above is very readable, compared to the teneray operator that looks like a ? b : c that exits in other languages. It always confuses me.

List Comprehension

List comprehensions are supposed to replace building a list by looping and calling append. Compare the following.

numbers = [1, 2, 3, 4, 5, 6, 7]
squares = []
for num in numbers:
    squares.append(num * num)

# with a list compression 
squares = [num * num for num in numbers]

We can also make this more complicated by adding in filtering or putting a conditional assignment in:

numbers = [1, 2, 3, 4, 5, 6, 7]

# squares of all the odd numbers
squares = [num * num for num in numbers if num % 2]

# times even numbers by 2 and odd numbers by 3
mul = [num * 3 if num % 2 else num * 2 for num in numbers]

Generator expressions

List comprehensions have one possible problem: they build the list in memory right away. If you are dealing with big data sets, that can be a big problem, but even with small lists, it is still extra overhead that might not be needed if you are only going to loop over the results once there is no gain in building this list. So if you can give up being able to index into the result and do other list operations, you can use a generator expression, which uses very similar syntax, but creates a lazy object that computes nothing until you ask for a value.

# generator expression for the square of all the numbers
squares = (num * num for num in numbers)

# where you would likely get a memory problem otherwise

with open('/some/number/file', 'r') as f:
    squares = (int(num) * int(num) for num in f)
    # do something with these numbers

Generators using yield

Generator expressions are great, but sometimes you want something with similar properties but not limited by the syntax that generators use. Enter the yield statement. So, for example, the below will create a generator is an infinite series of random numbers. So as long as we keep asking for another random number, it will happily supply one.

import random
def random_numbers(high=1000):
    while True:
        yield random.randint(0, high)

Dictionary Comprehensions

One generator use can be to build a dictionary, like in the first example below. This proved itself to be common enough that now there is even a new dictionary comprehension syntax for it. Both of these examples swap the keys and values of the dictionary.

teachers = {
    'Andy': 'English',
    'Joan': 'Maths',
    'Alice': 'Computer Science',
}
# using a list comprehension
subjects = dict((subject, teacher) for teacher, subject in teachers.items())

# using a dictionary comprehension
subjects = {subject: teacher for teacher, subject in teachers.items()}

zip

If you thought that generating an infinite number of random int was not that useful, well, here I want to use it to show another function that I like to use zip(). zip() takes several iterables and joins the nth item of each into a tuple. So, for example:

names = ('James', 'Andrew', 'Mark')
for i, name in zip(random_numbers(), names):
    print i, name

# output:
# 288 James
# 884 Andrew
# 133 Mark

So basically, it prints out all the names with a random number (from our previous random number generator) next to a name. Notice that zip() will stop as soon as it reaches the end of the shortest iterable. However, if that is not desired, the itertools module has one that goes till the end of the longest.

We could also do something similar to get a dict of each name mapped to a random number like this.

dict(zip(names, random_numbers()))

# output: {'James': 992, 'Andrew': 173, 'Mark': 329}

itertools

I mentioned itertools before. It is worth reading through if you have not looked at it before. Plus, at the end, there is a whole section of recipes on how to use the module to create even more interesting operators on iterables.

Collections

Python comes with a module that contains several container data types called Collections. Though I only want to look at two right, now it also has three more called namedtuple(), deque (a linked list like structure), and OrderedDict.

defaultdict

This is a data type that I use a fair bit. One practical case is when you are appending to lists inside a dictionary. If you are using a dict() you would need to check if the key exists before appending, but with defaultdict, this is not required. So, for example.

from collections import defaultdict

order = (
    ('Mark', 'Steak'),
    ('Andrew', 'Veggie Burger'),
    ('James', 'Steak'),
    ('Mark', 'Beer'),
    ('Andrew', 'Beer'),
    ('James', 'Wine'),
)

group_order = defaultdict(list)

for name, menu_item in order:
    group_order[name].append(menu_item)

print group_order

# output
# defaultdict(<type 'list'>, {
#     'James': ['Steak', 'Wine'],
#     'Andrew': ['Veggie Burger', 'Beer'],
#     'Mark': ['Steak', 'Beer']
# })

We could also count them like this.

order_count = defaultdict(int)

for name, menu_item in order:
    order_count[menu_item] += 1

print order_count

# output
# defaultdict(<type 'int'>, {
#     'Beer': 2, 
#     'Steak': 2, 
#     'Wine': 1, 
#     'Veggie Burger': 1
# })

Counter

But the last example is redundant because Collections already contains a class for doing this, called Counter. In this case, I need to first extract the second item from each tuple, for which I can use a generator expression.

from collections import Counter

order_count =  Counter(menu_item for name, menu_item in order)
print order_count

# output
# Counter({
#    'Beer': 2,
#    'Steak': 2,
#    'Wine': 1,
#    'Veggie Burger': 1
# })

Another better example might be counting all the different lines that appear in a file. It becomes straightforward.

with open('/some/file', 'r') as f:
    line_count = Counter(f)

If you enjoyed this post or found it helpful, please leave a comment or share it on Twitter. Also, if people find this useful, I will try and do some follow-up posts explaining some things in more detail and with additional examples.

Edit: if you have found this helpful but want more, there is an excellent book, Python Cookbook, Third edition by O’Reilly Media, that has a whole lot more. If you want something simpler, try Learning Python, 5th Edition.